1. String(문자열) concatenation (연속)
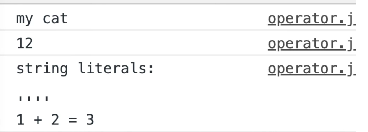
console.log('my'+'cat');: + 기호를 이용한 문자열을 합해서 새로운 문자를 만들 수 있다.
console.log('1'+2);: 문자열에 숫자 더하면 숫자가 문자열이 돼 합쳐짐
console.log(`string literals: 1 + 2 = ${1 + 2}`);: 빽틱 기호(``) 활용해서 string literals도 만들 수 있는데 $이용하면 변수 값을 계산해서 string으로 포함해서 문자열을 만들게된다.
📍string literals의 장점:
- 줄바꿈 하거나 특수기호인 싱글코트('')를 사용해도 그대로 출력됨
ex)
''''
1 + 2 = ${1 + 2}`);
+ console.log('ellie's book');
-싱글코드로 문자열 만들면 싱글코트가 인식되지X. 이럴 경우 백슬러시를 이용해야 제대로 표시됨.
ex)
console.log('ellie\'s book');
console.log('ellie\'s book');
console.log('ellie's /nbook');줄바꿈할때는 \n
ex)
console.log('ellie's /nbook');
\t 탭
ex)
console.log('ellie's /n\tbook');
===>이런 특수기호는 따로 검색하기. 알아만둘것.
2. Numeric operators (숫자연산자)
: 숫자를 연산할 수 있음.
console.log(1 + 1); //add
console.log(1 - 1); // substract
console.log(1 / 1); // divide
console.log(1 * 1); // multiply
console.log(5 % 2); // remainder
console.log(2 ** 3); // exponentiation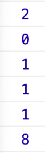
3. Increment(++) and decrement(--) operators
:증가(++)와 감소(--) 연산자
let counter = 2;
const preIncrement = ++counter;

// counter = counter + 1;
// preIncrement = counter;
- counter라는 변수가 있으면 변수앞에 ++기호를 앞에 붙여주는 것은 아래 // 내용과 동일함.
- 변수(counter) 앞에 ++를 붙이는 것은 변수(counter)에 1을 더한 후 그 변수(counter)의 값이 해당 변수(preIncrement) 의 값이라는 뜻.

const postIncrement = counter++;

// postIncrement = counter;
// counter = counter + 1;
: postIncrement 변수 뒤에 ++를 붙이면 counter 변수를 postIncrement에 할당한 후 counter 변수에 1을 더하는 것.
- counter 다음에 ++기호를 붙이면 변수 값(counter = 2, 여기서 ++counter 해서 3이 증가된 상태이므로) 3을 post변수에 할당한다음 counter의 값을 1 증가시킨다. 그 다음 카운터의 값이 1 증가하니까 카운터의 값은 4.

===> -- 도 같은 원리이다.
4. Assignment operators
: 할당 연산자
// 4. Assignment operators
let x = 3;
let y = 6;
x += y; // x = x + y;
x -= y; // x = x - y;
x *= y; // x = x * y;
x /= y; // x = x / y;
- 중복되는 x값을 하나로 표현하기 위해 +=, -=, *=..... 등으로 표현
5. Comparison operators
:비교연산자
// 5. Comparison operators
console.log(10 < 6); // less than
console.log(10 <= 6); // less than or equal
console.log(10 > 6); // greater than
console.log(10 >= 6); // greater than or equal
6. Logical operators ★
: 논리 연산자
: or, and, not
// 6. Logical operators : || (or), && (and), ! (not)
const value1 = false;
const value2 = 4 <2;
< || (or) >
: value나 expretion들 중 하나라도 true면 true로 되는 연산자.
: 함수 check 는 쓸데 없이 시간낭비 한 후 결국, true를 return한다.
// || (or), finds the first truthy value
console.log(`or: ${value1 || value2 || check()}`);

function check(){
    for (let i = 0; i < 10; i++){
        //wasting time
        console.log('😭');
    }
}
중요 POINT!
📍 앞에서 true가 나오면 멈춘다. 하나라도 true면 끝나버리기 때문.
📍 무거운 함수는 뒤로, 심플한 value의 값을 앞에 둬야 앞에 값이 false일 때 마지못해 호출하는 것이 제일 좋다.
< && (and) >
: 모두 true가 돼야한다.
: 앞에서 false가 나오면, 뒤에는 체크X.
: || (or)과 마찬가지로 함수를 뒤쪽으로 호출할 것.
// && (and), finds the first falsy value
console.log(`and: ${value1 && value2 && check()}`);

// often used to compress long if-statement
// nullableObject && nullableObject.something
if (nullableObject != null){
    nullableObject.something;
}
: 간편하게 null 체크할 수 있다.
: object가 null이면 false이기 때문에 뒤에 실행X. null object가 null이 아닐때만 something 이라는 value를 받아오게된다.
if (nullableObject != null){
nullableObject.something;
}
이 코드로 유용하게 사용할 수 있다.
< ! (not) >
: 값을 반대로 바꿔줌
: value 1이 true 이기 때문에, false로 바꿔줌.
// ! (not)
console.log(!value1);
7. Equality
// 7. Equality
const stringFive = '5';
const numberFive = 5;

// == loose equality, with type conversion
console.log(stringFive == numberFive);
console.log(stringFive != numberFive);

// === strict equality, no type conversion
console.log(stringFive === numberFive);
console.log(stringFive !== numberFive);
loose equality (==, 타입을 변경해서 검사한다)
: stringFive과 numberFive이 같다고 나옴 >> stringFive가 문자열이긴 하지만 안에 있는 건 숫자 5니까 둘이 똑같아! 라고 해석되는 것.
(==) 같다
(!=) 같지않다
strict equality (===, 타입 다르면 다른것으로 검사)
: stringFive과 numberFive이 다르다고 나옴
: 코딩 검사할 때 sctrict equality를 사용 하는 걸 추천

// object equality by reference
const ellie1 = { name: 'ellie'};
const ellie2 = { name: 'ellie'};
const ellie3 = ellie1;
console.log(ellie1 == ellie2);
console.log(ellie1 === ellie2);
console.log(ellie1 === ellie3);
- object는 메모리에 탑재될 때 reference로 저장됨.
- ellie1과 ellie2는 똑같은 데이터가 들어간 object지만 실제 메모리에 1과 2에는 다른 reference가 들어있다.
- ellie3은 ellie1의 reference가 할당돼있어 1과 똑같은 값을 가졌다.

▼
console에는 어떻게 출력될까?
console.log(ellie1 == ellie2); //false;
console.log(ellie1 === ellie2); //false;
console.log(ellie1 === ellie3); //true;
- ellie1과 ellie2는 똑같은 값을 가졌지만 reference가 다르기 때문에 false
- ellie1 ellie2는 똑같은 타입이든 아니든 reference의 값이 다르기때문에 false
- 같은 reference의 값을 할당했기 때문에 true
ellie1 > ref1 > name
ellie2> ref2 > name
ellie3 >ref1
//equlity - puzzler
console.log(0 == false);  //0은 false로 간주되기 때문에 true
console.log(0 === false);  //0 은 boolean type 이 아니기 때문에 false
console.log('' == false);  //비어있는 값은 false로 나오기 때문에 true
console.log('' === false); //비어있는 값 자체는 boolean type이 아니기 때문에 false
console.log(null == undefined); //null과undefined는 같은 것으로 간주되기 때문에  true
console.log(null === undefined); // 하지만 /null과undefined는 다른 type이기 때문에 false
[출처] JavaScript #4 [defer, 변수, operators]|작성자 zero
8. Conditional operator
: if, else if, else
// 8. Conditional operators : if
// if, else if, else
const name = 'ellie';
if (name === 'ellie') {
    console.log('Welcome, Ellie!');
} else if (name === 'coder'){
    console.log('You are amazing coder');
} else {
    console.log('unknown');
}
- if ( )가 true → 다음 { }실행. (console로그에서 Welcome, Ellie!가 출력된다)
만약 const name이 code라면?
// 8. Conditional operators : if
// if, else if, else
const name = 'coder';
if (name === 'ellie') {
    console.log('Welcome, Ellie!');
} else if (name === 'coder'){
    console.log('You are amazing coder');
} else {
    console.log('unknown');
}
- 만약 이름이 coder 라면 ellie가 아니므로 else if 로 넘어간다. 그것도 아니면 그 다음에 있는 else{ } 로 넘어간다.
9. Ternary operator
: 삼항 연산자
// 9. Ternary operator : ?
// condition ? value1 : value2;
console.log(name === 'ellie' ? 'yes' : 'no');
: ? 사용시, true면 :의 왼쪽에 있는 것(yes)을 사용하고 false면 : 오른쪽에 있는 것(no)을 실행한다.
: 간단한 출력시 많이 사용 (복잡해지면 계속 써야하는 번거로움이 있기 때문에 if 함수나 switch를 쓰는 게 좋다)
: ellie가 아니므로 no가 출력된다

10. Switch operators
// 10. Switch statement
// use for multiple if checks
// use for enum-like value check
// use for multiple type checks in TS
const browser = 'IE';
switch (browser) {
    case 'IE':
        console.log('go away!');
        break;
    case 'Chrome':
        console.log('love you!');
         break;
    case 'Firefox':
        console.log('love you!');
        break;
    default:
        console.log('same all!');
        break;
}
: switch 안에 값 (browser)값이 'IE'이면 'go away!'실행하게 되고,
break; 멈춘다는 뜻.
chrome 이면 콘솔로그 love you를 출력하고 멈추고....
똑같은 값이 겹치면 연달아 쓰면 자동적으로 묶어서 출력된다.
ex)
case 'Chrome':
case 'Firefox':
console.log('love you!');
break;
- if에서 else if 다음 else if...계속 반복한다면 switch를 사용해보는 것을 권유.
11. Loops (반복문)
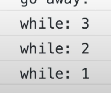
: while ( )의 값이 false가 될때까지 계속 반복
: i가 0보다 크면 console.log(`while:${i}`);을 실행하고 i의 값을 1 마이너스 해준다.
// 11. Loops
// while loop, while the condition is truthy,
// body code is executed.
let i = 3;
while (i > 0) {
    console.log(`while: ${i}`);
    i--;
}
do-while loop
: 앞에 있는 do{ }블럭을 실행한 다음 while의 조건을 검사하고 멈춤.
: 블럭을 먼저 실행하고 싶다면 do while, 조건문이 맞을때 block이 실행돼야한다면 while.
// do while loop, body code is executed first,
// then check the condition.
do {
    console.log(`do while: ${i}`);
    i--;
} while (i > 0);
for-loop
//for loop, for(begin; condition; step)
for(i = 3; i > 0; i--){
    console.log(`for:${i}`);
}
for loop 는 begin은 처음 한번만 실행되고 그 후엔 condition이 맞으면 실행, 실행된 후에 step이 실행되서 begin이 처음 한 번만 실행되고 나면 condition과 step만 조건에 맞을 때까지 반복해서 실행

(완전 풀어서 설명하자면, i=3 한번만 실행함. 3은 0보다 크니? true => console로그 실행 → i--는 1을 감소한다는 뜻이므로 2는 0보다 크니? true =>console로그 실행..... → 반복)
<inline variable declaration>
for(let i = 3; i > 0; i = i - 2){
    //inline variable declaration
    console.log(`inline variable for:${i}`);
}
: for 문 안에서 let이라는 변수를 선언해서 실행할 수도 있음.
< nested loops >
//nested loops
for (let i = 0; i < 10; i++){
    for(let j = 0; j < 10; j++){
        console.log(`i: ${i}, j: ${j}`);
    }
}
for문 안에 for문을 작성할 수 있는데 이런 경우
i가 0이면 j가 1부터 9까지인 경우가 출력된 후
다시 i가 1이면 j가 1부터 9까지인 경우,
i가 2이면 j가 1부터 9까지인 경우 ,
.
.
.
i가 9이면 j가 1부터 9까지인 경우
가 모두 출력!
>이러는 경우 cpu에 좋지 않음. 되도록이면 피하는 게 좋다.
(여러번 읽어봐야 이해됨)
<break, continue>
: loop안에서는 break, continue 라는 키워드 사용해서 끝낼 수 있다.
- break : 멈춤
- continue : 지금 것을 멈추고, 다음 스텝으로 넘어감.
문제를 풀어보자
Q1. iterate from 0 to 10 and print only even numbers(use continue)
: 숫자 0-10까지 숫자를 짝수만 프린트 해서 'continue' 써서 만들기
내 답:
for(let i=0; i < 10; i + 2) {
쓰다말았다.. 11인지 10인지 긴가민가했는데 역시나 11이었다..ㅋㅋ
<정답>
for (let i = 0; i < 11; i++){
    if (i % 2 !== 0) {
        continue;
    }
: i를 2로 나눴을 때 나머지 값이(i%2)이 0이 아닐 경우(!== 0) 해당 값은 건너뛴다.
Q2. iterate frome 0 to 10 and print numbers until reaching 8 (use break)
: 숫자 0-10까지 프린트하되 숫자 8이 나오면 'break'써서 멈추기
내 답:
for(let i = 0; i < 10; i++) {
if (i = 8) {
break;
}
<정답>
for (let i = 0; i < 11; i++) {
    if (i > 8) {
        break;
    }
- 1부터 10까지였으니까 i < 11
- i가 8보다 커진다면 멈추기
[출처] JavaScript #4 [defer, 변수, operators]|작성자 zero] 많이 참고함!
'📌Development > JavaScript' 카테고리의 다른 글
| [JS] DOM이란? #1 Node에 접근하는 방법 (0) | 2023.03.26 |
|---|---|
| [JS] Arrow Function은 무엇인가? 함수의 선언과 표현 (0) | 2023.03.13 |
| [JS] 데이터타입, data types, 변수 선언 let vs var, hoisting (1) | 2023.03.12 |
| [JS] 콘솔에 출력, script async 와 defer의 차이점 (0) | 2023.03.12 |
| [JS] JavaScript의 역사, 현재 그리고 미래 (0) | 2023.03.11 |


